-
Give the necessary basic information of the event including the event name.
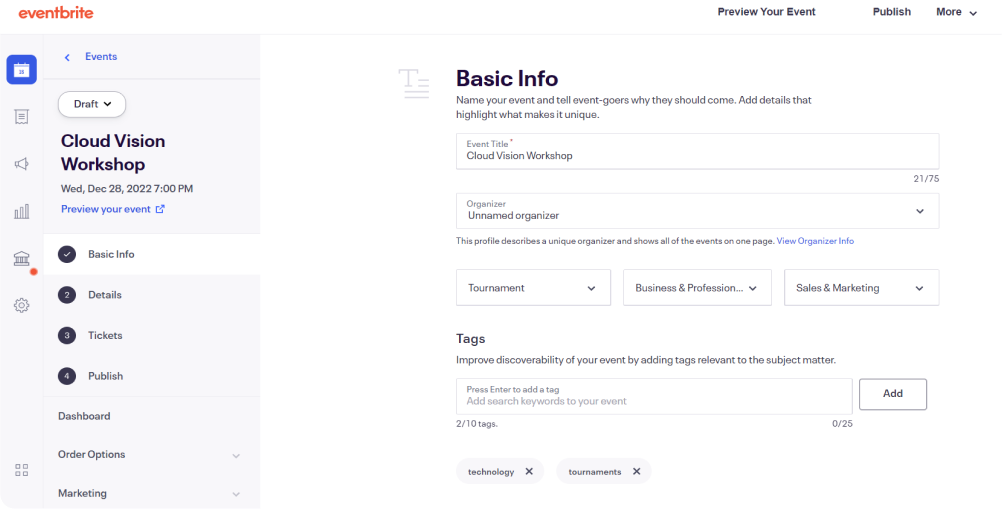 ✔
✔ -
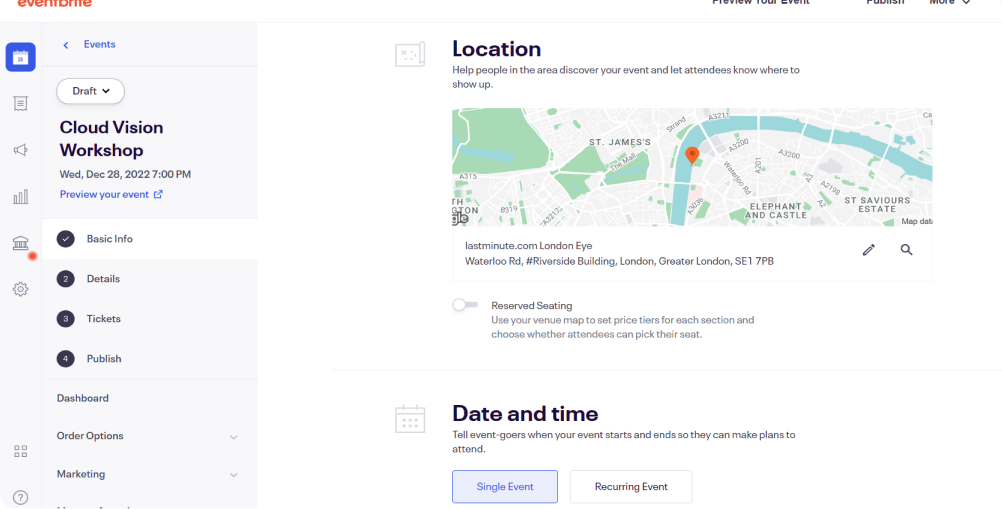
Input the Location with full address, can use Google map of the location to be viewed.✔
-
Set the Date and time for the start and end date of events making sure to check you have the correct time zone, displayed in Advance settings.✔
-
At the bottom right hand of the screen click on Save and Continue.
 ✔
✔ -
To add a Main event image, just drag and drop an image in place. In the Description summary, you can input important details about the event. Images and videos can also be added here.
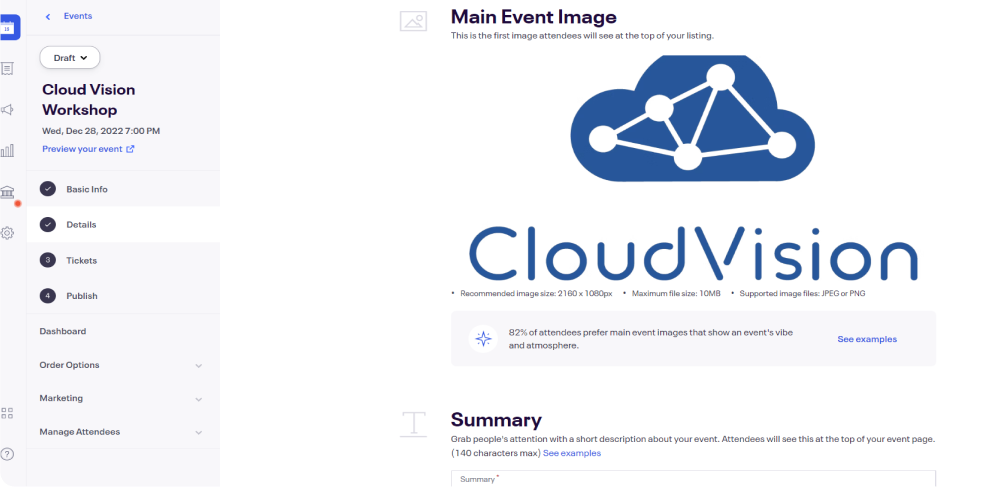 ✔
✔ -
At the bottom right hand of the screen click on Save and Continue. This takes you to the Create your first ticket page.✔
-
Select any Type of ticket to create, 'Paid, Free, Donation'.✔
-
Give a Custom name for the ticket, this will appear on the event listing and on mobile tickets and email order confirmations.✔
-
Add the Quantity of tickets required of this ticket type for the event.✔
-
Add the Price of the Ticket, not including fees. Tickets can also be free or if you choose the donation type ticket, no fee will be charged.✔
-
Provide tickets start and end date. If there is more than one ticket type, sales can begin when sales end for another ticket type.
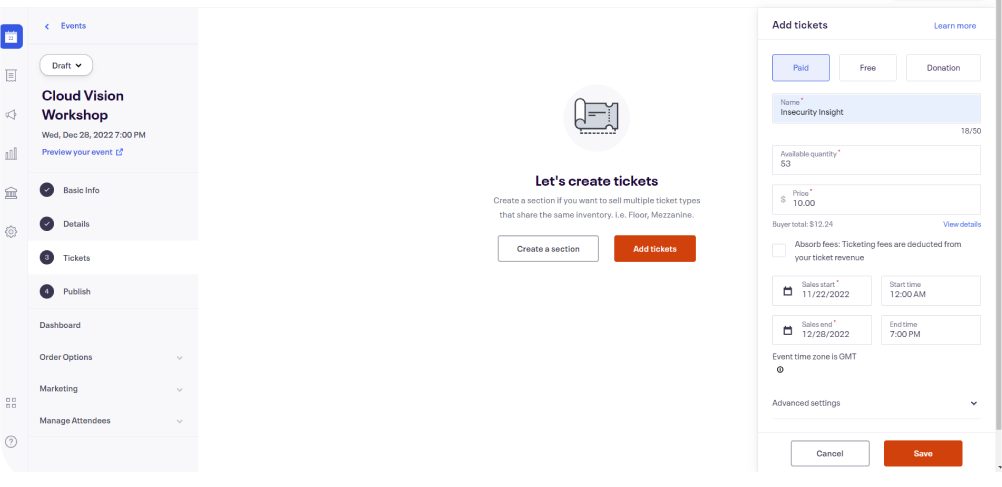 ✔
✔ -
Click on Advanced settings to add a description, select visibility, number of tickets and sales channel.✔
-
Add a Description to provide attendees with more information on the ticket.✔
-
Select Visibility, this controls which ticket types attendees can see.✔
-
Add the minimum and maximum quantity Tickets per order to be sold.✔
-
Select the Sales channel of where the tickets will be available to buy.
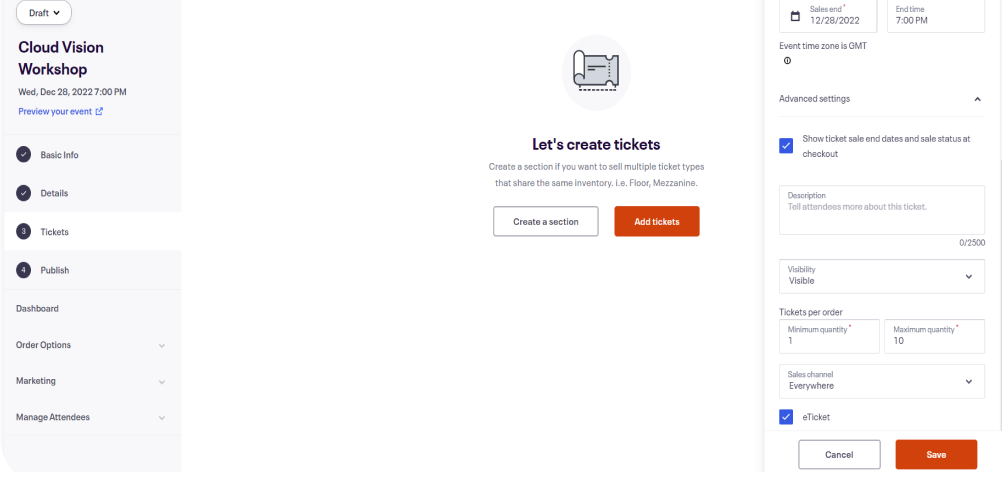 ✔
✔ -
Click Save when the changes have been made.✔
-
The page shows you the ticket information, then click to Publish.✔
-
To add an additional ticket for the same event, click on Create ticket and repeat the process. All the tickets created for this event will be shown on the Tickets page.✔
-
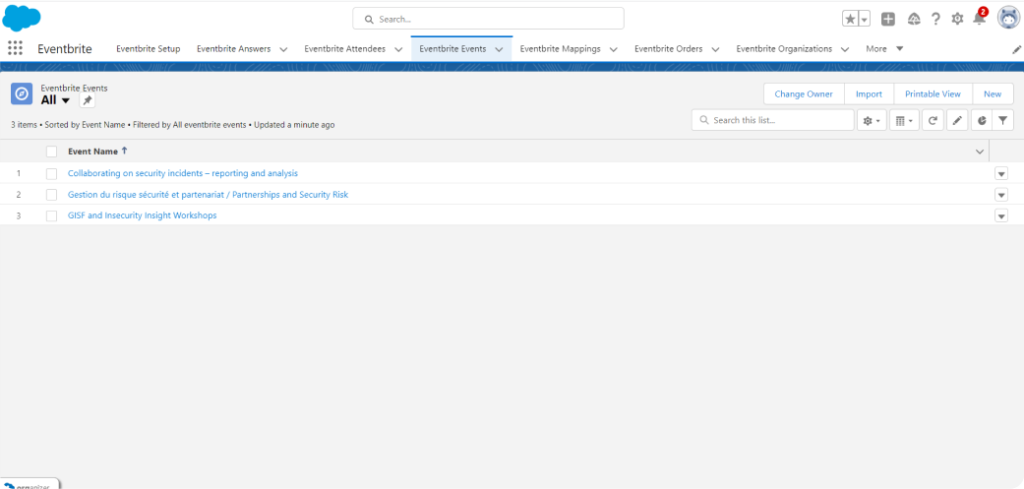
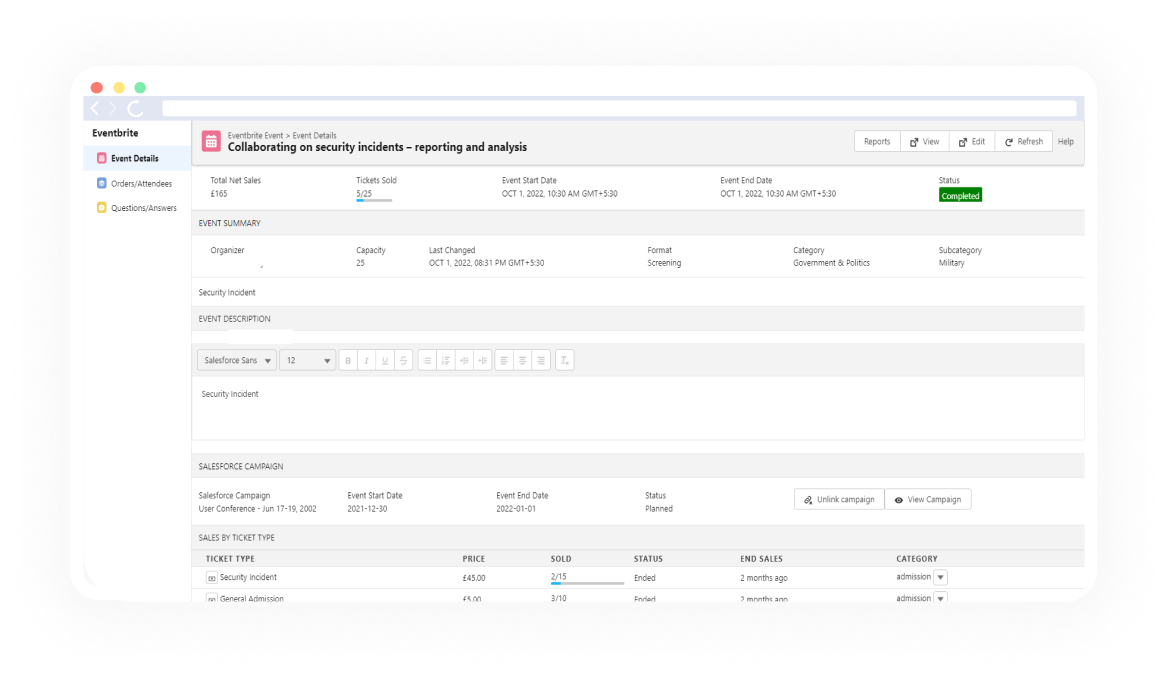
Open any particular event, will redirect you to the event details page.✔
-
Here you can view Net sales, ticket sales, event start and end date, description and sales by ticket type.✔
-
On the top right hand of the page you can select Reports, View, Edit, Refresh.✔
-
Click on View, this takes you into Eventbrite and shows the Event's ticket page.
 ✔
✔ -
On the top right hand of the Salesforce Eventbrite events page, Click on Edit, this takes you into Eventbrite and displays the event information page where you can perform changes in the Event.✔